Kiss Chemical Balms Goodbye: DIY Natural Lip Balm in 15 Minutes! 💋✨
Hey there, lip balm addict!
Remember when I spent $8 on a “natural” tube only to find petroleum as the first ingredient? 😤 That’s when I raided my kitchen, melted some magic, and created balms softer than a puppy’s ear. Today, I’ll show you exactly how to make your own—with 3 foolproof recipes and zero weird chemicals. Let’s get those lips kissably smooth!
Why Your Lip Balm is Secretly Sabotaging You
Most store-bought balms are like sugary cocktails for your lips—addictive but damaging. Here’s the ugly truth:
-
Petroleum jelly (a.k.a. petrolatum) coats lips but doesn’t moisturize (study via EWG).
-
Synthetic fragrances can cause allergies (hello, itchy lips!).
-
Phenol in “tingly” balms thins your skin over time (yikes!).
Meanwhile, DIY balms:
✅ Feed lips with oils + butters
✅ Cost pennies per tube
✅ Smell like vanilla dreams 🍦
The 3-Ingredient Hero Formula (Seriously, That’s It!)

All natural lip balms need just 3 pillars:
| Ingredient | Role | Best Picks | Avoid If… |
|---|---|---|---|
| Oil | Moisture carrier | Coconut 🌴, almond, jojoba | Acne-prone (coconut clogs pores!) |
| Butter | Nourishment | Shea, cocoa, mango | Nut allergy (use shea!) |
| Wax | Firmness + hold | Beeswax 🐝, candelilla wax (vegan) | Vegan (skip beeswax!) |
*Pro tip: Add 1 tsp honey for extra healing power (science-backed humectant!)*
My “Oops-Proof” Beginner Recipe 🧴
*(Inspired by wellness guru Sarah’s 5-star tutorial)*
Why you’ll love it: Only 4 ingredients + sets in 10 mins!
Yields: 10 mini tins
Ingredients:
-
2 tbsp organic coconut oil
-
1 tbsp raw shea butter
-
1 tbsp beeswax pellets (or candelilla for vegan)
-
10 drops vanilla essential oil (food-grade!)
Tools:
-
Double boiler (or a glass bowl over simmering water)
-
Pipette or spoon
-
Empty lip balm tins/tubes
Step-by-Step (My First Batch Was Lumpy—Learn From My Mistakes!)
-
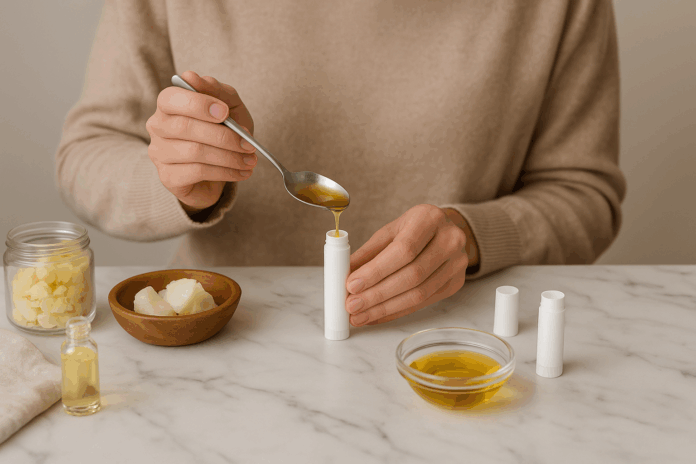
Melt gently: Combine oil, butter, and wax in a double boiler. Stir until smooth like liquid gold! (No boiling—it kills nutrients!)
-
Cool slightly: Remove from heat. Wait 1 minute.
-
Scent & pour: Add vanilla. Quickly pour into tins.
-
Set untouched: Leave for 1 hour (or freeze for 15 mins if impatient like me!).
⚠️ Game-changer tip: Test firmness by dripping a drop on a plate. If it hardens in 2 mins, your mix is perfect! If runny, add more wax.
Customize Your Balm Personality!
-
For cracked winter lips: Swap 1 tbsp oil for manuka honey (healing powerhouse!)
-
SPF boost: Add non-nano zinc oxide (this reef-safe mineral blocks UV rays!)
-
Tinted glam: Stir in 1 tsp beetroot powder for a rosy flush 🌷
(Pssst: Grab zinc and beetroot powder from reputable suppliers like Mountain Rose Herbs!)
DIY vs. Store-Bought: Shocking Showdown
| Factor | DIY Balm | Commercial Balm |
|---|---|---|
| Cost per tube | $0.30 | $3-$12 |
| Ingredients | 3-5 recognizables | 15+ chemicals |
| Eco-impact | Zero plastic (reuse tins!) | Plastic tube + packaging |
| Shelf life | 6 months (fridge) | 2+ years (preservatives!) |
Source: Environmental Working Group’s Skin Deep Database
Why My Lips Will Never Go Back
After years of peeling lips, I:

-
Week 1: Made my first cocoa-butter balm (it smelled like brownies!)
-
Month 2: Friends begged me for batches 🎁
-
Today: My purse has 4 custom balms—peppermint for energy, lavender for sleep, you get it!
✨ Magic moment: Rubbing fresh balm on and feeling actual hydration seep in—not just wax sitting on top!
Troubleshooting Lumpy Balms & Other Disasters
😅 Problem: Grainy texture
Fix: Your shea butter overheated! Next time, melt oils + wax first, then stir in shea off-heat.
😅 Problem: Too soft
Fix: Add ½ tsp more beeswax.
😅 Problem: “My balm tastes like crayons!”
Fix: Use FOOD-GRADE essential oils (lavender/peppermint are safest). Skip fragrance oils!
Your Balm-Making Flowchart

Ready to Whip Up Your Signature Scent?
Grab a pot, raid your pantry, and tag #DIYLipMagic on Instagram—I’ll share my fave creations! 🧴✨
Safety note: Patch-test new oils on your wrist first. Not for use on broken skin!
Sources & Gear:
-
EWG’s Skin Deep® Cosmetics Database (decode ingredients!)
-
Mountain Rose Herbs (organic oils + waxes)
-
Lab Muffin’s DIY Cosmetic Safety Guide (nail melting temps!)
-
Humblebee & Me’s Lip Balm Tutorial (creative recipes!)


